After you have created a parking facility in Security
Center, you must define the facility for your parking
scenario by creating sectors and rows for the license plate collection route.
What you should know
The parking space of a parking facility is divided into sectors (or levels in the case of a
parking garage) for ease of reference. Each sector contains x number of rows, and each row
contains x number of spaces. You can configure Genetec
Patroller™ to trigger an alarm (sound or warning message)
if the reads collected during your sweep of a row exceed the space count for that row.
The
route is the license plate collection route followed by the MLPI units
responsible for collecting the plates for the inventory. The route is downloaded by the
patrol vehicles and handheld devices assigned to this parking facility.
NOTE: Only one route may be defined per parking facility, but each MLPI device can start its
sweeping round at a different point in the route. The route forms a closed
circuit.
To configure a parking facility:
-
From the Config
Tool home page, click , and select the facility you want to configure.
-
Click the Properties tab.
-
From the LPR Manager drop-down list, select the LPR Manager that
will create and manage the license plate inventory for the selected parking
facility.
Only offloads from MLPI patrol vehicles managed by the same LPR Manager are used to
build the inventory for this parking facility. An MLPI Genetec
Patroller™ offload can include the vehicle inventory
for multiple parking facilities, but only the reads tagged for this parking facility are
used to build the inventory.
-
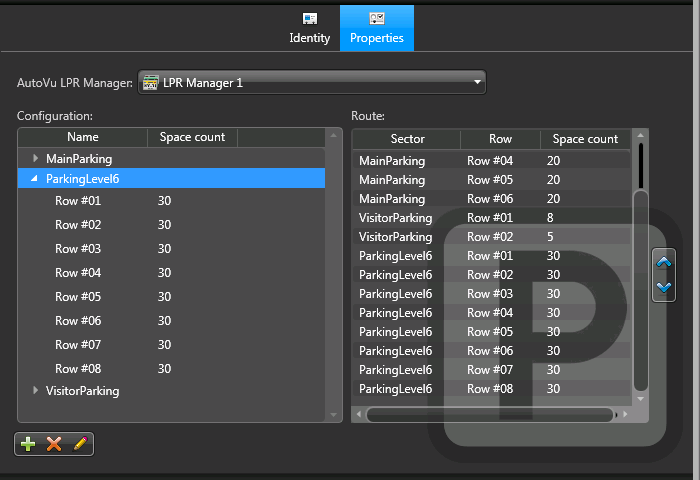
Under Configuration, click Create (
 ) to add a new sector.
The parking space of a parking facility is divided into sectors (or levels in the
case of a parking garage) for ease of reference. Each sector contains x number of
rows.

-
Enter the Name of the sector (or level if you have a parking
garage).
-
Enter the Number of rows in the sector.
-
Click OK.
The sector you created appears under the Configuration
and Route sections.

-
To add rows to a sector, do the following:
-
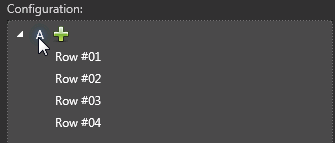
Under Configuration, mouseover the sector name, and then
click the Create (
 ).
).
-
Enter the Number of rows to add, and then click .
-
(Optional) To rename a sector, do the following:
-
Under Configuration, click the sector name you want to
rename, and then click Edit (
 ).
).
-
Enter the new name, and then click .
-
(Optional) To delete a sector, click the sector name you want to delete under
Configuration, and then click the Delete
(
 ) > Apply.
-
To change the order of sectors and rows in the route, click the up (
 )and down (
 ) arrows under
Route.
After you finish
You must set the Read retention period of
the LPR Manager according to the period of time you want to keep your license plate
inventories in the database. The default retention period is 90 days.


