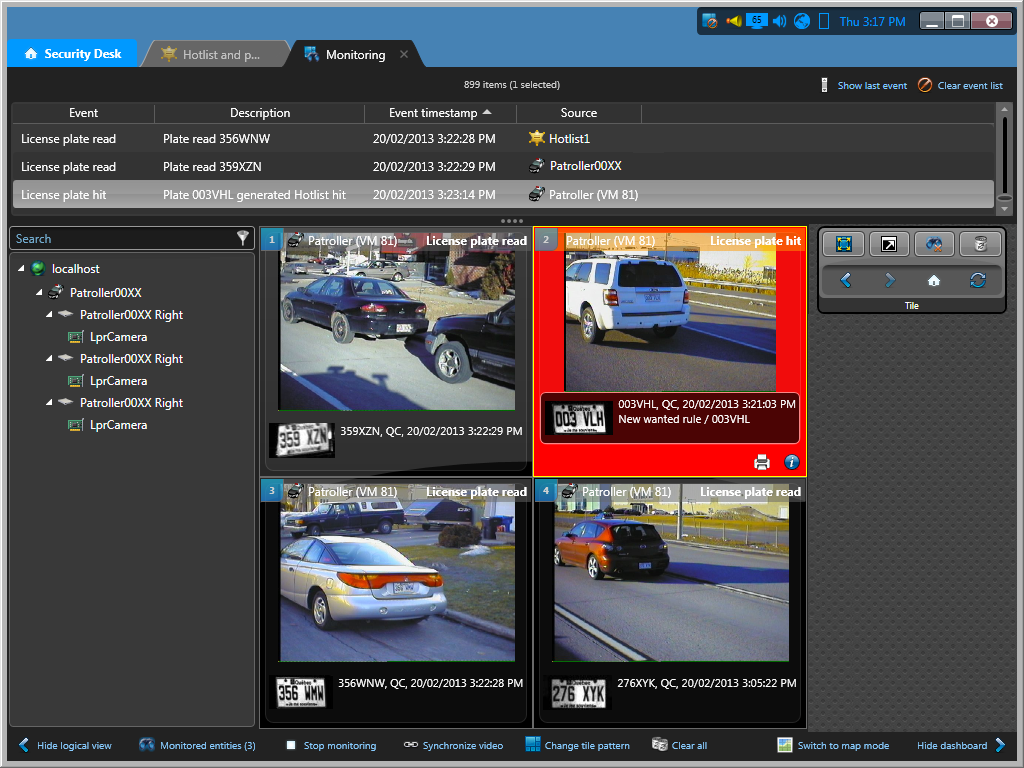
By default, LPR events are displayed in the canvas in tile mode, which allows you to view information about the
read or hit, view the plate images from the events in high resolution, print hits, and so on, in
individual tiles.
To monitor LPR events in tile mode:
- In the Monitoring task, select an LPR event in a tile, or double-click an event from the
event list.

The following information about the LPR event is displayed in the tile by default:
Entity name:

Name of the entity you are monitoring, shown in the tile toolbar.
LPR event name:

Event type (License plate read, License plate hit, and so on), shown in the tile
toolbar.
Tile background color:

- Black (Default). Plate read event.
- Red (Default). Hotlist hit event.
- Green (Default). Permit hit event.
- Blue (Default). Shared permit hit and overtime hit
event.
NOTE: You can change the default colors of LPR events from hotlists,
overtime rules, and permit restrictions in Config
Tool. For
more information, see the Security
Center Administrator
Guide.
Context image:

Wide-angled image of the vehicle that was read by the LPR
unit context camera.
Plate image:

Image captured by the LPR camera and the OCR interpretation
from the event.
Plate number:

License plate number.
Plate state:

Origin of the license plate.
Date and time:

Date and time of the plate capture assigned to the hit rule
that matched the plate.
Address:

Location of the unit when the plate image was captured.
NOTE: The address is only
shown if the geocoder module is enabled in Config
Tool. If Genetec
Patroller™
is not equipped with maps, then the address is only shown if the geocoder is
enabled to resolve the GPS position.
(Hits only) Hit rule:

Hit rule that produced the hit.
(Overtime hits only) Tire/Overview image:

Wheel image captured by the wheel-imaging camera
that is mounted at the back of the Genetec
Patroller™ vehicle. Wheel images
are only shown if the hit was captured by a Genetec
Patroller™ that supports
wheel imaging.
- To check the watermark status of the LPR event, right-click inside the tile, and
then click Verify watermark.
A watermark confirms that an LPR event is valid (for example,
that it has not been tampered with). Security
Center adds a watermark
to all reads and hits recorded by fixed Sharps, and Genetec
Patroller™ adds
a watermark to Sharps installed on the vehicle. The three watermark
statuses are the following:
- Good (
 ).
).
- Invalid (
 ).
).
- If no icon appears, the watermark has been tampered with.
- (Hits only) To view more information about the hit, such as its hotlist attributes, click
 in the tile (user, accept or reject reason,
plate state, and so on).
- (Hits only) To print the event data as proof of the violation, click
 in the tile.


