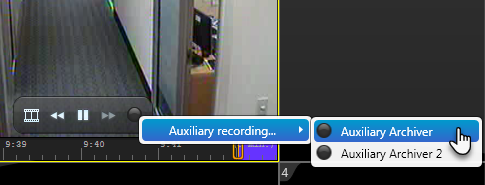
For local and federated cameras that are controlled by an Auxiliary Archiver, you can manually start recording video on the Auxiliary Archiver from Security
Desk when you see something of interest.
Before you begin
The camera must be controlled by an Auxiliary Archiver, and the recording mode of the Auxiliary Archiver or camera must be set to manual. For more information about configuring Auxiliary Archivers and the recording modes of cameras, see the Security
Center Administrator Guide.To manually record video on an Auxiliary Archiver:
-
Select a camera displayed in a tile.
-
Do one of the following:
-
Click the record button (
 ) next to the Auxiliary Archiver role name.
If the camera is associated with multiple Auxiliary Archivers, select which Auxiliary Archiver to record on.

The video starts recording on the Auxiliary Archiver you selected, and is saved in the Auxiliary Archiver database.

