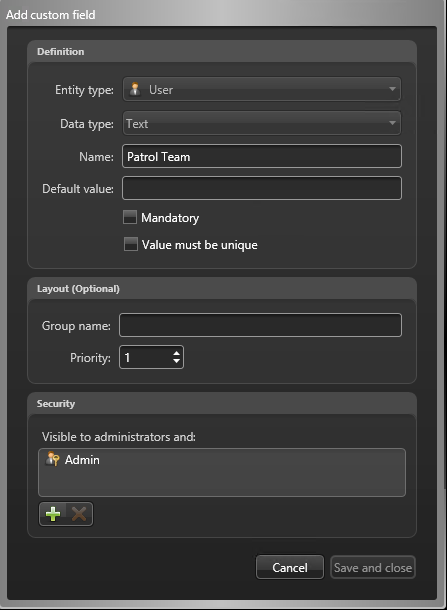
To use custom fields with hits and reads, you must first create a custom field that applies to user entities.
To create a user custom field:
- From the Config Tool home page, open the System task, and click the General settings view.
-
Click the Custom fields page, and click Add an
item
 .
.
-
From the Entity type drop-down list in the Add custom
field dialog box, select User.

-
From the Data type drop-down list, select a standard or custom
data type for the custom field.
For example, select Text.
-
In the Name field, type the name for the custom field.
For example, type User ID.
- (Optional) In Default value field, type or select the default value for this field.
-
Depending on the selected data type, the following additional options are
available:
- Mandatory:
 Select it if this custom field cannot be empty.
 - Value must be unique:
 Select it if the value of this custom field must be unique.NOTE: The unique value option can only be enforced after the field is created. To enforce this option, you must first make sure that all entities in your system have a distinct value for this custom field, then come back to this tab to apply the unique value option to it.
-
(Optional) Under the Layout section, type the Group
name, and select the Priority from the drop-down
list.
These two attributes are used when displaying the field in the Custom fields tab of associated entity. The group name is used as the group heading, and the priority dictates the display order of the field within the group.
-
(Optional) Under the Security section, click
 to add users and user groups that will be able to see this
custom field. By default, only administrative users can see a custom field.
- Click Save and close.
-
Click Apply.

The new user custom field User ID is available in your users’ Custom fields tab.
