To adjust how license plates captured by Sharp are matched to license plates in a
hotlist or permit list, you must configure the LPR matcher logic.
What you should know
You configure LPR matcher settings in the MatcherSettings.xml file, and then apply
your changes in Server
Admin and the Server
Admin console.
The overtime matcher is used as an example, but the same steps apply to all the matchers in
the XML file.
To configure LPR matcher settings:
-
On the computer hosting the Security
Center
Directory role, open Windows Explorer and then go to C:\Program Files\Genetec Security Center 5.8.
-
Open MatcherSettings.xml in Notepad or a similar text editor.
-
Add or remove OCR equivalent characters from the list.
The default OCR equivalent characters are listed between the
<OCR> and </OCR> tags. Add new
<Equivalent>____</Equivalent> lines, or delete the lines
you do not want.
-
Specify the number of character differences you want to allow.
Edit the
PerLengthSetting line that applies to the plates in your
region. For example, Quebec plates typically have six or seven characters, so edit the
NumberOfDifferencesAllowed value in the sixth and seventh
PerLengthSetting lines.
NOTE: A value of “0” turns the
setting off.
-
Specify the number of OCR equivalent characters you want to allow by editing the
NumberOCREquiAllowed value. This turns on OCR equivalence.
NOTE: A value of “0” turns the setting off.
-
(Overtime only) Specify the number of common and contiguous characters.
For common characters, edit the NecessaryCommonLength value. For
contiguous characters, edit the NecessaryContiguousLength value.
-
Save and close the text editor.
-
Apply the LPR matcher settings in Server
Admin, as follows:
-
From a web browser, open Server
Admin typing
http://<server>/genetec.
-
From the Servers section on the
Overview page, select the server that hosts the Directory
role.
-
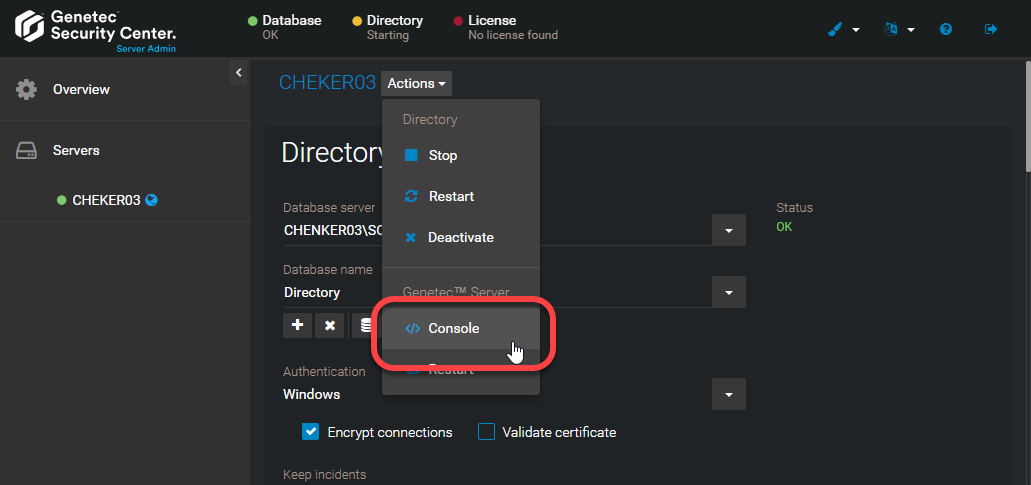
Next to the server name, click .
-
Click the Commands tab.
-
Clear the User commands only
checkbox.
-
From the list of commands, click
UpdateAutoVuGlobalSettings.
-
Close Server
Admin.
-
Restart the Security
Center Directory role, as follows:
-
From a web browser, open Server
Admin typing
http://<server>/genetec.
-
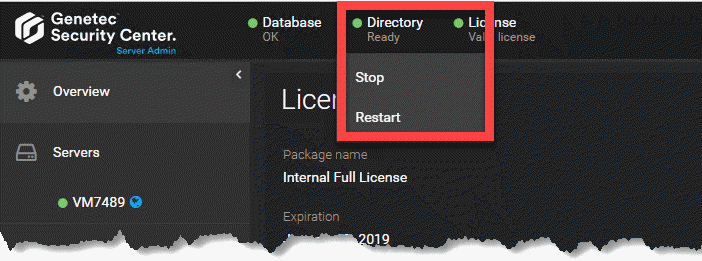
Click Directory and select
Restart.
-
After the Directory restarts, close Server
Admin.
LPR matcher settings are now configured and applied to all the LPR Manager roles on your
system. Genetec
Patroller™ units
are updated the next time they connect to Security
Center wirelessly, or when you manually transfer
Genetec
Patroller™ settings using a USB key.
After you finish
Verify that your LPR Manager roles have been updated by looking at the
MatcherSettings.xml file in their corresponding root folders
(C:\Genetec\AutoVu\RootFolder\ManualTransfer\General). You can also tell by the XML
file’s Date modified field that it has been updated.


