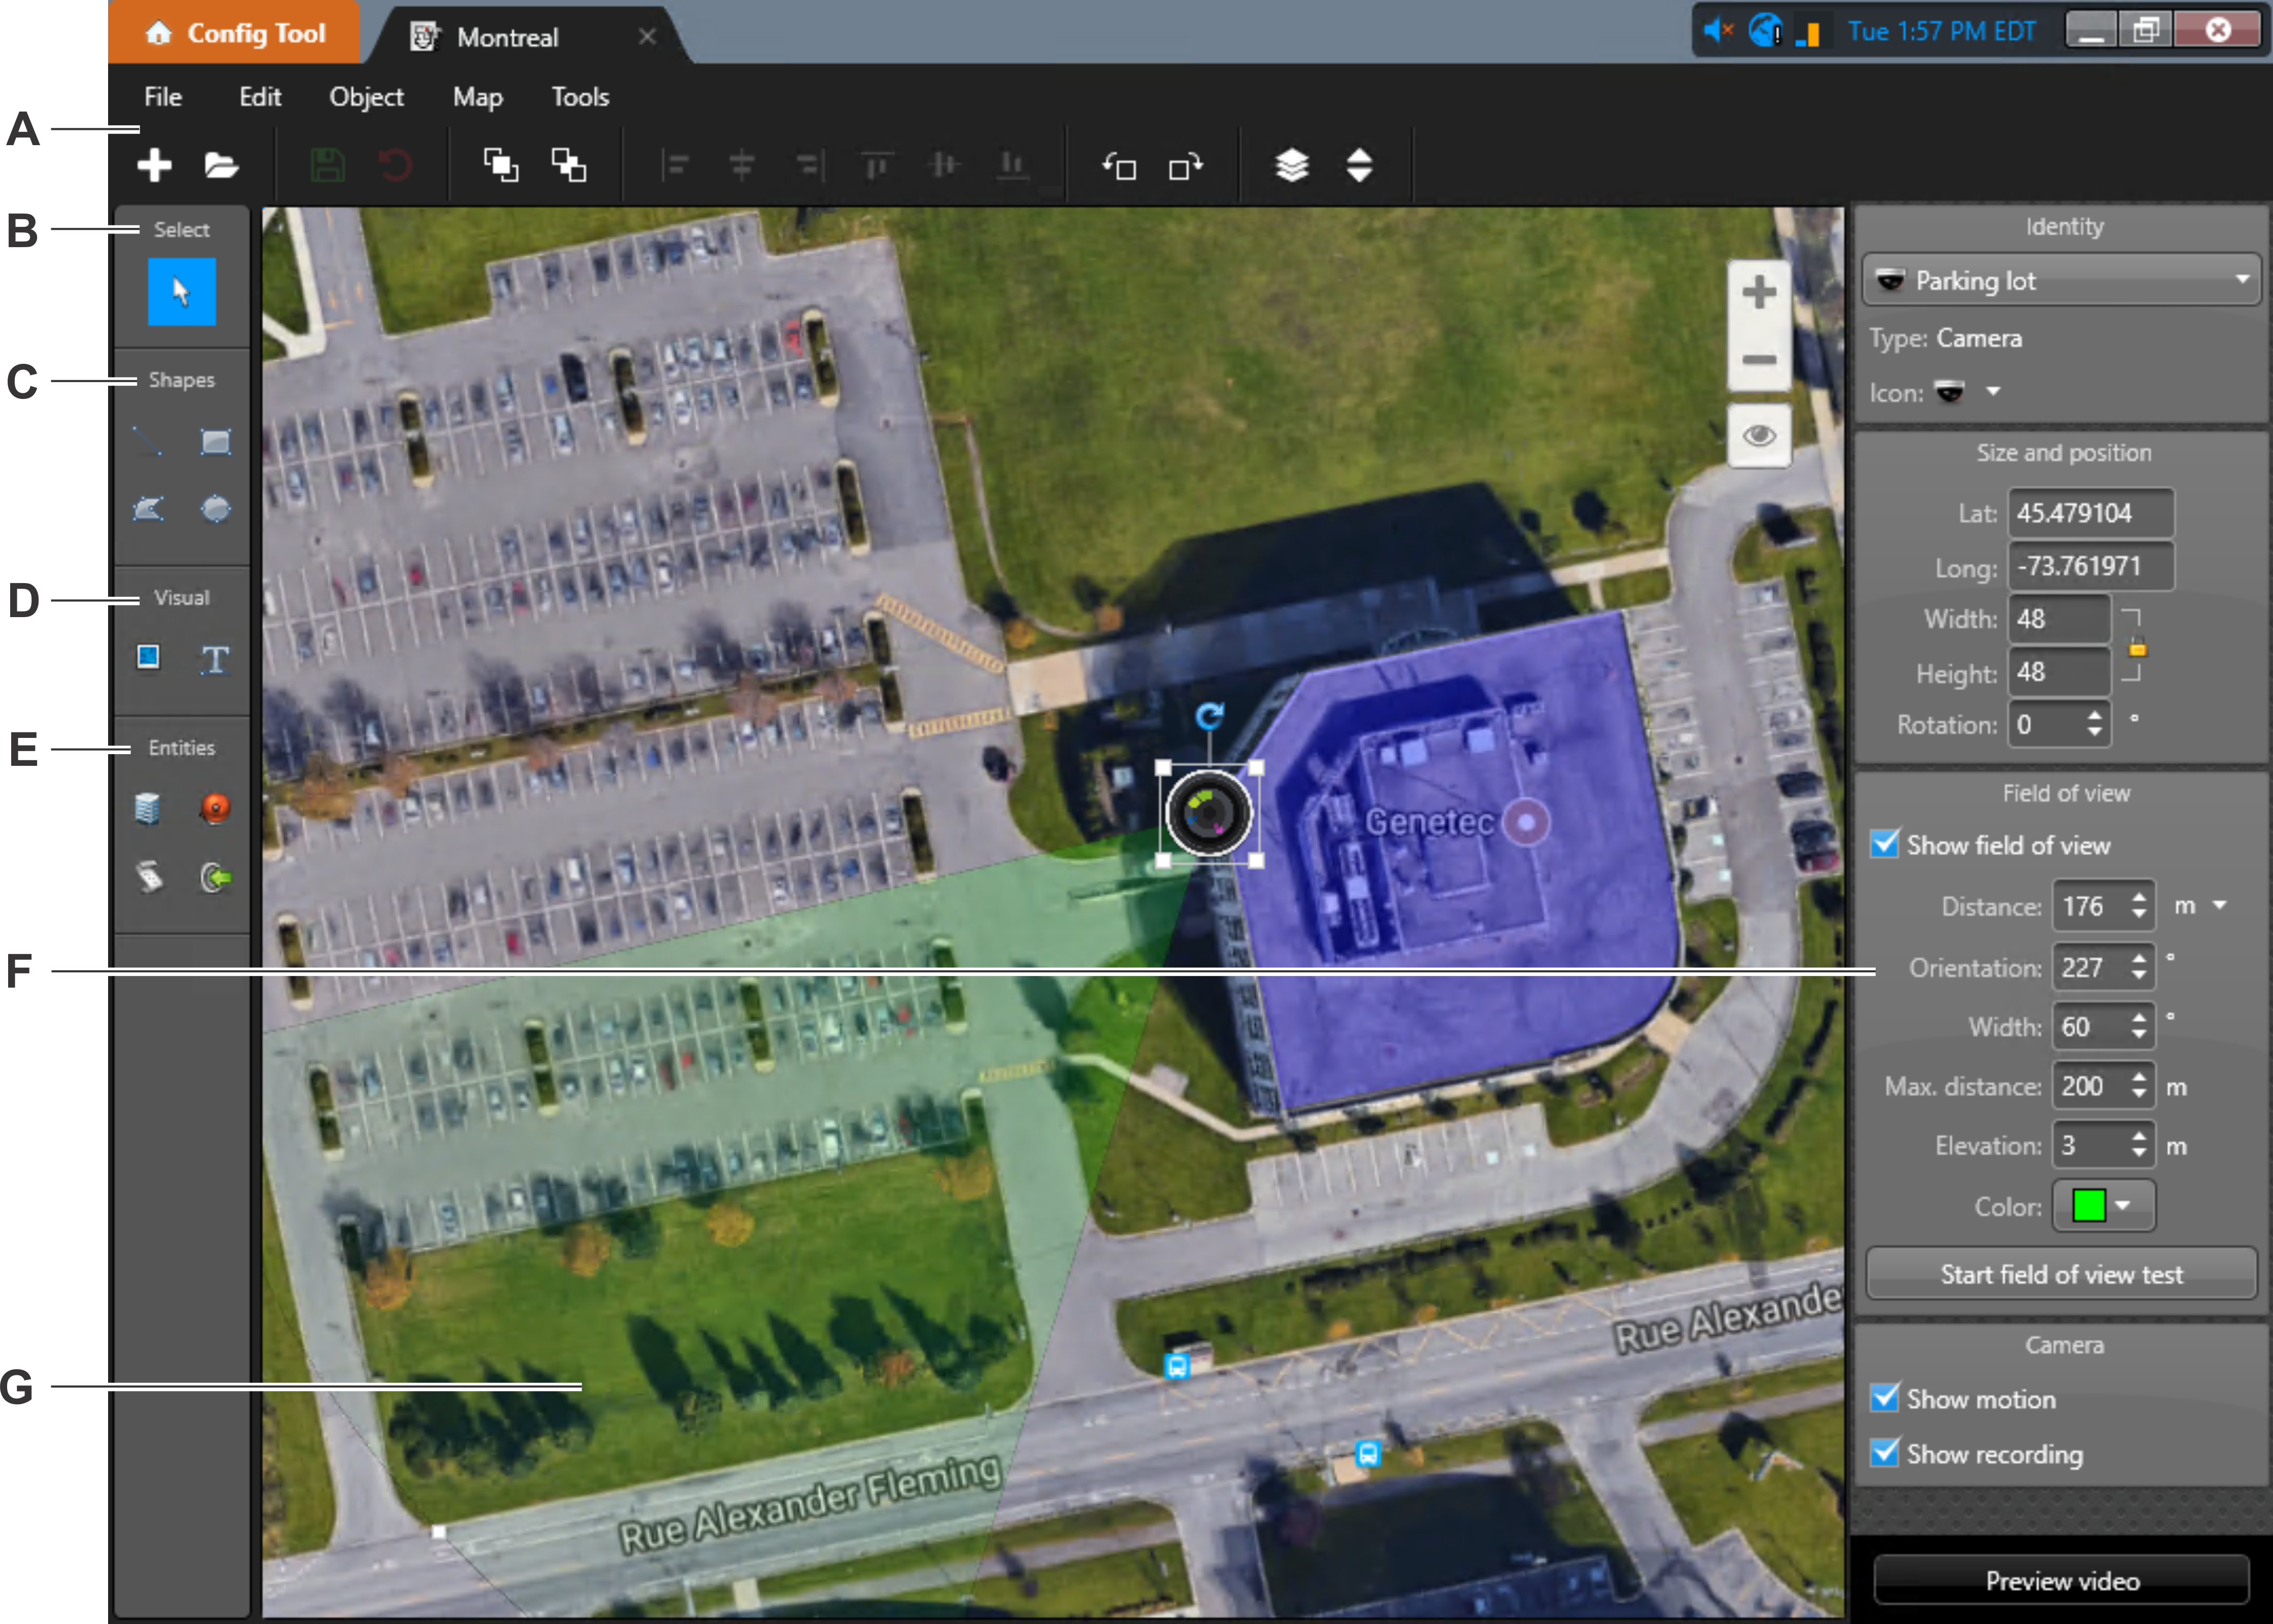
| A |
Use the Map designer menu and toolbar to create, edit, and
delete the maps in your system, as well as arrange the map objects on your map. |
| B |
Selection tool ( ): Click a map object to select it. You can also do the following: ): Click a map object to select it. You can also do the following:
- Click and hold the map background to move it.
- Zoom in to an area of the map by holding the Ctrl key, and then clicking and
dragging.
- Select multiple map objects with a rectangle, by holding the Alt key, and then clicking and dragging.
- Select all the map objects of the same type that are in view, by holding the
Alt key, and then clicking a map object.
|
| C |
Draw vector objects: Draw line: Click and drag to draw a single line segment to represent a
wall.
 Draw
rectangle: Click and drag to draw a rectangle. Drag a handle to change its
size. Note that you cannot change a rectangle into a different type
of polygon.
 Draw
polygon: Click once for each endpoint, and click the first endpoint to close the polygon. Use Shift+click to add or remove a point between two points. Double-click a point to complete the polygon without closing it.
 Draw ellipse: Click and drag to draw an ellipse. Drag a handle to change its size.
|
| D |
Insert images and text: Insert
image: Opens a browser for you to select an image file, and click to place
it on the map.
 Insert
text: Click to place a text box on the map. Double-click the text box to
enter the text. Use the widgets to adjust the appearance of the
text.
|
| E |
Create map objects representing entities: Area view: Click the area view to create map objects representing areas, intrusion
detection areas, cameras, camera sequences, monitoring layouts, doors, LPR
cameras, and zones.
 Alarms: Click, select, and drag an alarm to the map.
 Macros: Click, select, and drag a macro to the map.
 I/Os: Click, select, and drag an input pin, output relay, or a unit to the map.
NOTE: It is possible to select I/Os federated and local cameras.
|
| F |
Use the widgets to configure the selected map object. When multiple map objects
are selected, only the common widgets are displayed. |
| G |
Click and drag the FOV to position it on the map. |